Ever critical, not sure I like this one. The fabric's quite heavily printed so has a lovely weight to it but there's an awful lot of white (and yellow).
Still a lot of white but maybe the lime on the outside would have been better?
These fabrics were from a recent trip to Goldhawk Road. 10 or so fabric shops with an hour on the parking meter = kid in a sweetshop syndrome! I needed more time .......... time to look in all of them and then make purchase decisions but I didn't have time so it was rushing from one to the other, making a few purchases along the way. One of the first ones we came to was closed until 1.30 for prayers so I had just a couple of minutes in there last ........... they had stuff that I'd just paid more for over the road say no more and ever conscious that we were now, sadly, out of parking time. Needless to say we shall be going back.
Thankyou for the comments on the last few posts (I shall catch up on blog reading .......... there is just so much out there now I keep getting distracted!!). Luckily I had some spare fabric so the black rose bag has now been fixed by hand applying a panel over the offending area and I'll probably keep that one for myself.
.
Having really enjoyed designing and making the bag for my daughter before Christmas, I thought I'd try some more in different fabrics. Romantic roses ...................
Victorian Roses ...................
Then disaster strikes ....................
All done, I was removing the remaining gathering and basting stitches when I noticed a sizable brown patch (rather like gravy browning). Puzzled, I tentatively rubbed the fabric with a damp towel and it disintegrated before my eyes .............. it was burnt! I can only imagine that it was during pressing at some stage but when and how I do not know .............. it's odd! Beyond tears I think ...................
.
Since I started to find hand embroidery more stressful due to the eyesight, I've been thinking that a machine with a few more stitched patterns than my Bernina 1008 can offer might be useful.
Bernina owners like Berninas don't they? The 350PE beyond budget yet not unachievable looked the most likely machine for me. However, a quick call to a dealership suggested that I probably wouldn't like it and would fare better with a Juki so off we went and tried out the Juki F300. Purchase home, a few minutes play on home ground and I really didn't like it. My eyes really weren't good enough to differentiate clearly between the clear feet and the fabric, I didn't like the quite flimsy clear bobbin cover, needle plate would need to be unscrewed for cleaning, the needle clamp screw protrudes quite a lot and knocks my hand when free machining or anything else that requires the hands to be very close to the work. I packed it up, had a very restless night, got it back out again in the morning but didn't feel any different ............. I wanted the Bernina really didn't I?
Back we went, explained the problem (nothing wrong with the machine ........... it's just me!) tried out a Bernina 380 as it was the one on display ............ yes, fine .......... full metal feet, front loading bobbin, it's familiar.
Happy, happy, happy - the 350PE it is!
Got it home, felt a bit strange putting the bobbin in as though there was some play towards one side at the rear ................. a bit more rickety than the 1008. Ok, a few straight stitches .......... fine. Moving into patterns which is what I really wanted it for .......... the red stars on the right then a couple of other designs (the green stitching was done on the Juki) ............... doesn't look nice, the fabric feels like it's being sucked in and the needle is moving across before it's fully emerged from the fabric. Check threading, bobbin ok, change to embroidery threads (on another sample) then before I had chance to review anything the mother of all jams! I wasn't expecting miracles but, for the money paid, I was expecting a decent machine working nicely from the start. Back in the box within 5 minutes of getting it out!
I now have the Juki back:
It's very early days and I'm still scared of it ............ the "computerised" bit meaning it's something more to go wrong but it's very user friendly. Already I'm loving the automatic thread cutter (no wasted thread), the needle threader is saving me loads of time, it's much quieter than the front loading bobbin machines which will please the rest of the family, the box feed system is very good ........... barely need to touch the fabric to keep it on the straight and the man in the shop sorted me out with a couple of metal feet which should help with following seams for the decorative stitches until I've sorted out exactly what feet will suit me and the machine best.
.
I'm glad these wallets are done because I'm seriously bored of them for now ..................
Tidying up to make room for the Christmas tree at the weekend, one finds all sorts of bags stuffed with embroidery bits .........................
Setting the scene ready for the festive season. In reality I expect it will be long gone by then but this is last night ...................
It's been snowing for over 24 hours now virtually non-stop albeit very light so we have a mere 8" yet still enough to be snowed in !!
.
I'm pleased with this so fingers crossed for Christmas morning ..............
about 10" high (not including handles) ............
Zippered top panel ...................
A zipped inner pocket ..........
A learning curve, there's a couple of things I would do differently ............ no less an inner elasticated pocked (for a mobile phone etc..) where I stupidly followed instructions from a book and should have done it my own way from the beginning and a big thankyou to the ladies at TSF for suggestions and advice on how to attach the frills.
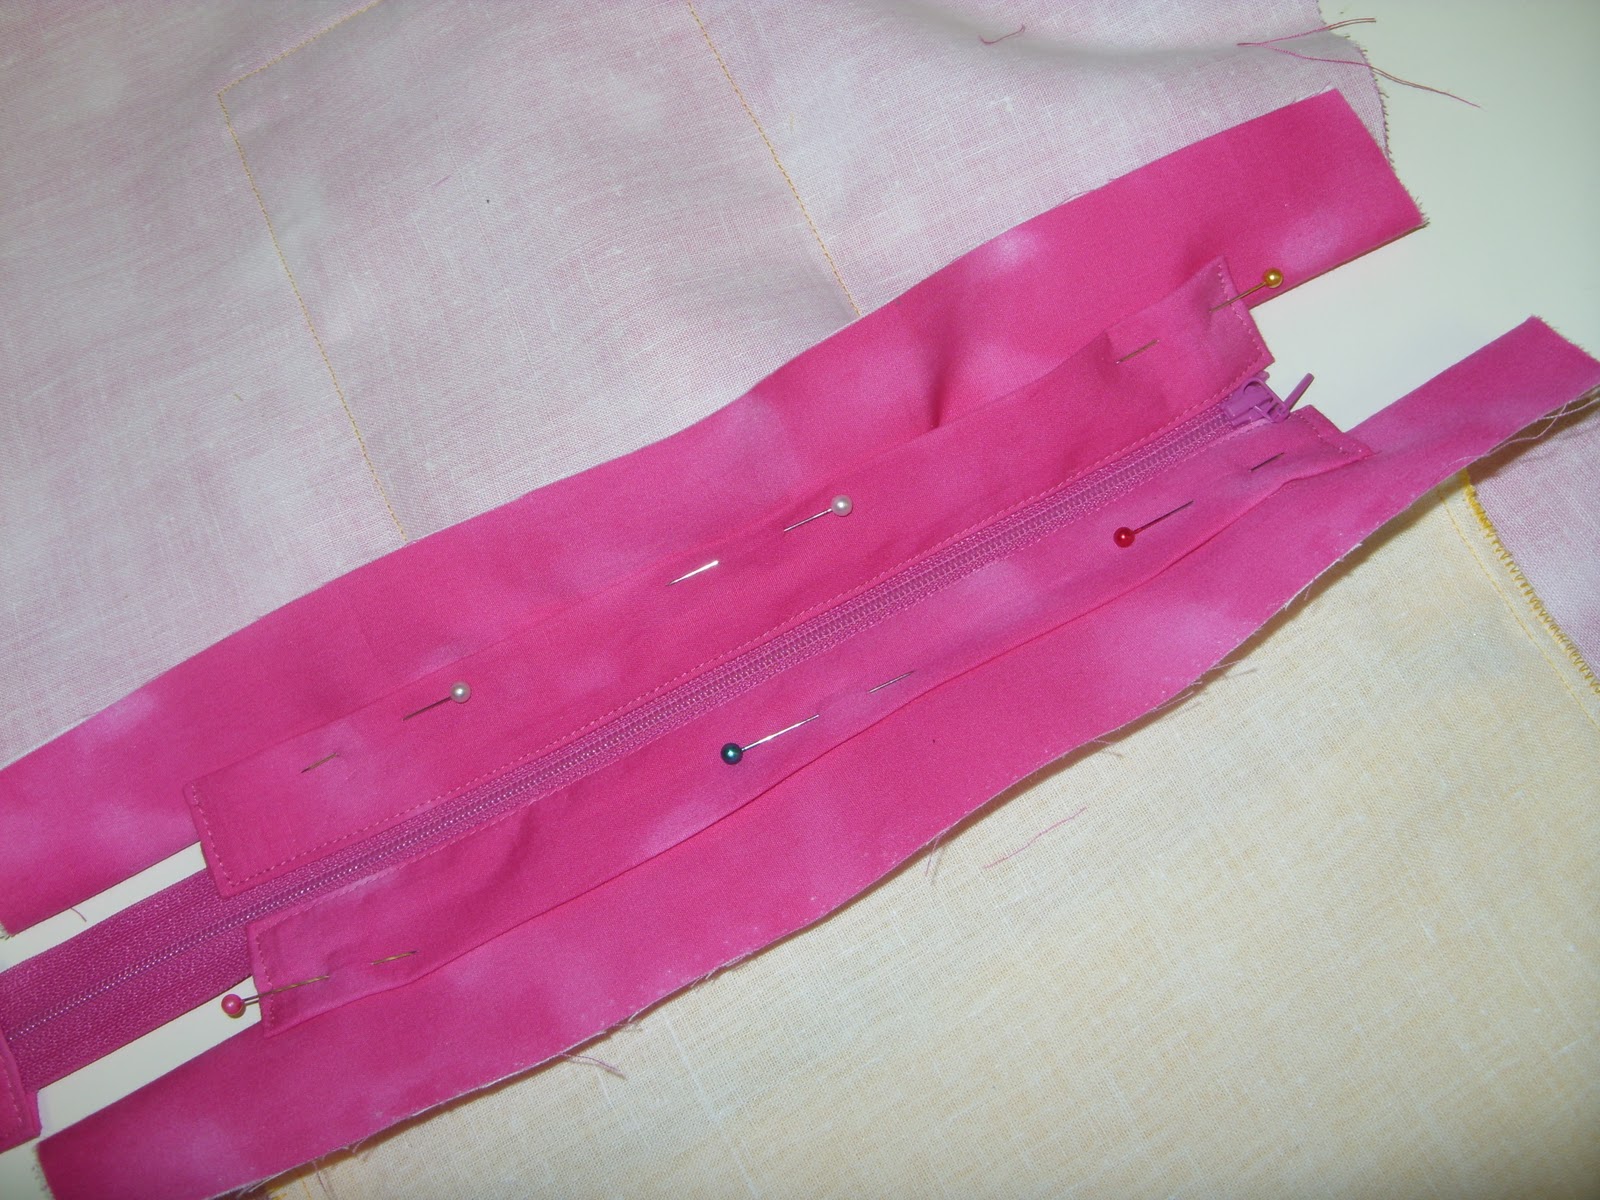
Especially for Jackie ................ inserting a zipper panel (my way not necessarily the right way!). Cotton quilt/dress weight fabric interfaced with woven cotton interfacing/stayflex. The finished width of each strip adjoining the zip is 3/4" so cut strip double this width plus 1" for turnings and required length (plus 1" for turnings on the length). Turn edges under/press 1/2" along all raw edges and fold in half lengthways, press. Slip this casing over the zipper fabric ensuring pressed edges are equal both above and below the zip and stitch short edges and along zipper close to the edge through all layers to attach zip. Repeat for other side.
The folded edge on the outside is pinned to the lining (through one layer only - the lining is turned back on this pic just to show the zipper easier) and stitched close to edge. I stitched the zipper panel 1" down from the top of the above bag. On the bag a few posts ago I stitched the zipper panel through both the lining and bag outer but tried it a bit different this time by just stitching through the lining. It's better if the zipper overhangs the adjoining panels by a few inches so the bag can open fully. Very easy in reality but expect it sounds clear as mud!!
.
Still sewing ........... with more zingy colours ...........
That pink frill doesn't look quite right .................. like I've run out of fabric ..............
so another floral frill I think ...................
I thought the Christmas present list was dwindling but I have another purse to do, the one in the last post having gone to a new home so no time to spend on here really - handles, lining and fastening to think about and get on with too.
.
Shirt no. 1 .............
Shirt no. 2 was nearly finished when I noticed my fingertips had devloped a navy tinge ................. from the batik print! First thoughts were that it would probably be ok for an initial wear (with jeans) but then my husband said "what if it rains?". Oh yeah! So it's been in the washing machine and lost quite a lot of dye but still looks ok (pic is prewash) so it's just waiting for some buttons.
A wallet (or purse) ............. just a few French knots acting as random "quilting" stitches.
Opened out .........
A present from her mum for her first married Christmas, mum decided to redress her 1961 Christmas tree fairy but this is as far as it got!
I'm going to redress her but not with the old bits of lace in the pic ............ something more in keeping with her time (evident from her facial features and hair) I think.
.