
about 10" high (not including handles) ............


Zippered top panel ...................

A zipped inner pocket ..........

A learning curve, there's a couple of things I would do differently ............ no less an inner elasticated pocked (for a mobile phone etc..) where I stupidly followed instructions from a book and should have done it my own way from the beginning and a big thankyou to the ladies at TSF for suggestions and advice on how to attach the frills.
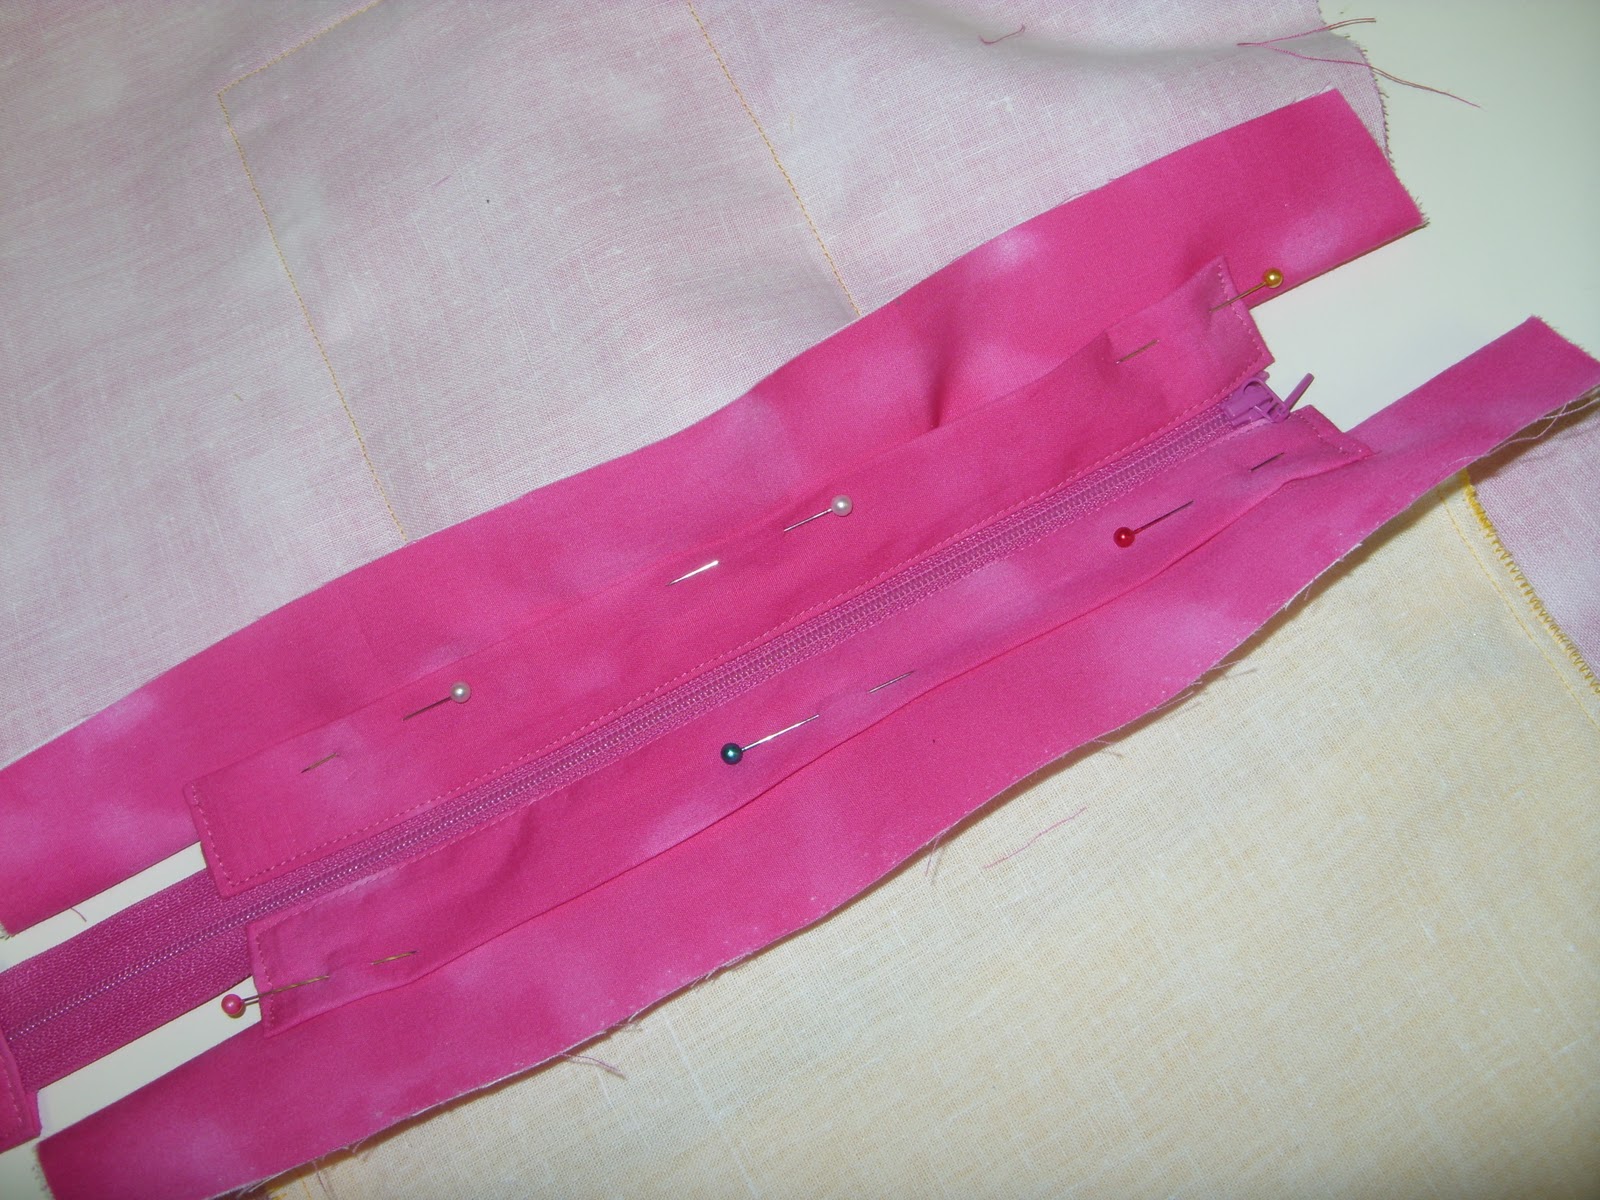
Especially for Jackie ................ inserting a zipper panel (my way not necessarily the right way!). Cotton quilt/dress weight fabric interfaced with woven cotton interfacing/stayflex. The finished width of each strip adjoining the zip is 3/4" so cut strip double this width plus 1" for turnings and required length (plus 1" for turnings on the length). Turn edges under/press 1/2" along all raw edges and fold in half lengthways, press. Slip this casing over the zipper fabric ensuring pressed edges are equal both above and below the zip and stitch short edges and along zipper close to the edge through all layers to attach zip. Repeat for other side.
The folded edge on the outside is pinned to the lining (through one layer only - the lining is turned back on this pic just to show the zipper easier) and stitched close to edge. I stitched the zipper panel 1" down from the top of the above bag. On the bag a few posts ago I stitched the zipper panel through both the lining and bag outer but tried it a bit different this time by just stitching through the lining. It's better if the zipper overhangs the adjoining panels by a few inches so the bag can open fully. Very easy in reality but expect it sounds clear as mud!!
3 comments:
Your purse turned out fabulous. Love the pink lining for this refreshing print ruffle fabric. Happy weekend to you...
Oh thanks! I think, more or less, this might be the way I did mine but it wasn't as neat as yours . It looks very professional and neat. Mine looks as if it was the loser in a fight.
It looks fantastic - so much fun!
Thanks for stopping by my blog!
Post a Comment