I've had quite a good week! In addition to processes learned and refreshed on the dress, the knitting bag is finished (not quite sure about the "rosette" but it will do) ............ and I worked out how to insert a top panel for the zipper. On reflection, some interfacing would have been beneficial so I'll try and remember that for next time (if there is a next time) .............
The sunflower didn't get finished but I had a large jigsaw puzzle in reserve so that was fine. Mum and dad found these pretty tassels in a "garage" sale kind of thing on their hols ............ mum thought they'd be ideal for my bags or even to hang on the Christmas tree ............. they'll probably go on the tree - very pretty for 40p.
Thankyou for all your comments ............. I do read them all.
.
The bag now has a lining ..............
The actual bag panels can be quite tricky to put together for the first time as in Easy Japanese Quilt Style so here are a few pics and notes for constructing the lining (the outer is the same but I had already done that)
Lay out the panels as above with the long side of "A" to the left, the long side of "B" against the short end of "A", the long side of "C" against the short end of "B" and the long side of "D" against the short end of "C". My fabric is laid out right side facing and I have numbered the stitching points for ease of reference when making up for the first time.
Flip panel "A" down over "B" right sides together ............ the short end of "A" lined up against the long side of "B" thus numbers 1 and 2 matching. I have marked stitching line allowing a 1cm seam allowance.
Machine stitch, starting and ending 1cm in from each end.
Press seam allowance open.
Line up panels again
Flip panel "C" over on to panel "B" right sides together (long side of panel "C" to short end of panel "B") making sure panel "C" is overlapping the previous seam 1cm at the top to allow seam allowance for turning.
Stitch seam from the previous seam ending 1cm from the bottom again .......... press open.
Lay out the panels again
Flip long side of "D" over short end of "C" ensuring "D" is overlapping the previous seam of "C" by 1cm as in picture though move the fabric up so raw edges meet (I have just lowered for the picture to show it a little clearer.
The panels should now look like this
Now stitch the short end of "D" to the long side of "A".
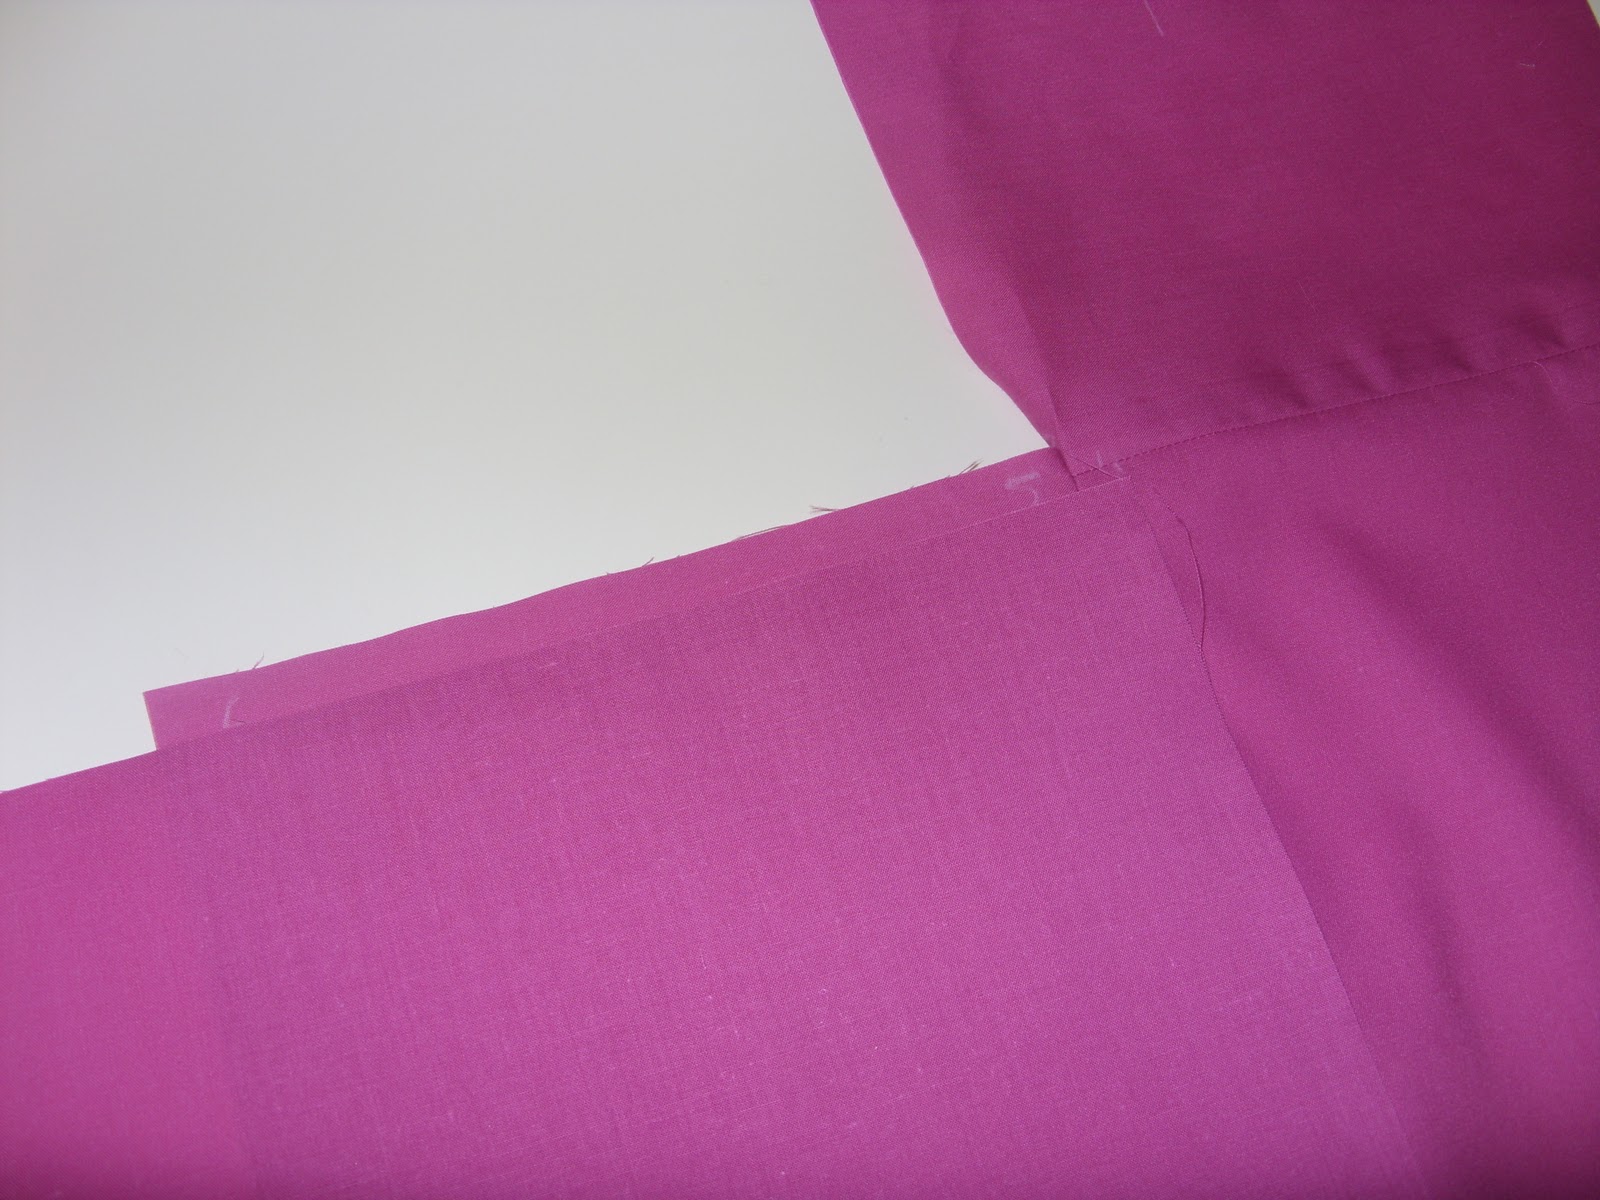
The above pic shows the intersection between panels "A" and "B"
Using the pivot point of stitching match panel "B" to panel "A" right sides together and pin working out from the pivot point towards the end ........... it should overlap a little at the top as in the picture. PLEASE NOTE ........... if you are stitching patched panels together then it is important to match the centre of the squares which will come in the centre of the seam to be stitched. If necessary stitch from this centre point out towards each end of the seam otherwise continue as follows ............
At this point you might find it easier to stitch the reverse of the pinned side ............ it is easier to see where the previous stitching ends thus where the new stitching should start to ensure a good corner. Press seam open.
It should now look something like this. Again, using the pivot point between "B" and "C", right sides together, bring the long side of panel "C" to the short side of panel "B", pin and stitch as previously.
The camera ran out of battery at this point but, as above, stitch panel "D" to "C" and then "A" to "D", press last seam allowance open. You should now have a "square" bag with the bottom of the bag having seams going from corner to corner and meeting in the middle (see top pic).
I hope this makes sense and helps somewhat.
.
One good deed deserves another so this is our (surprise) return favour ................
Yeah, it kind of bends the rules with large prints for babies but then if I'm making it, it's got to be fabric that I like .............. I could never be a professional seamstress!
Using McCalls pattern 4351, I positioned the print as best I could with the limited fabric I had ........... not to mention that the print was out of line on the fabric! Fully lined, I omitted the net interlining for the skirt as the cotton lining gives quite enough body and I added some piping along the skirt/bodice join (didn't have enough to do any more). If I were to make it again, I would probably hand hem the skirt and not, as the pattern suggests, machine straight stitch plus think about reducing the bulk from the gathered skirt in the bottom of the bodice.
I like it and am quite pleased being as the last time I made a baby/toddler dress was 1991 and before that back in the 70s! It shouldn't be long before I find out if mum likes it and, if it fits!!!
.
I am loving this months issue of Through the Needle free magazine and hope to start a "Foot Book"
I did a number of MB samples for C&G but they were various sizes, and encompassing a number of techniques, mostly executed on mum's old Bernina which has lots of satin stitch patterns. Not limiting to feet but seeing what I could get from the limited stitches on my 1008 could be fun.
Then there's this jacket which is so "me" ........... in a different colour ............ a different neckline ............ . I have an old Indian patchwork jacket that has lost half the mirrors and got partly wrecked in the washing machine ......... this is an idea for a replacement then!
As if I haven't got enough planned ............ think I need to get doing with less looking (and stay away from the dyes or at least remind myself that they are dyes)!!!!!!
.
Had it been sunny the lustre of the silk might show more but getting there .............
Lifesize, at a guess, 8-9" diameter and an expensive project with acid and/or disperse dye on 2 different blouses this week ................. oops!!!!!
.
Well, I've done a lot of trialling with the sunflower idea on how best to stabilise and transfer the design on to the silk. Am still at the leaves stage but think I have it sorted now and spent ages transferring outlines onto interfacing before realising it was stitch n tear duh!!! That'll teach me to put things away that I no longer need but, hey, tomorrow is another day!
One of the bags that I did earlier in the year .................
I was doing another as a knitting bag for an elderly friend in her 90s who knits all day and evening now her mobility is not so good. The stretch on the bias of the gingham threw the patchwork into disarray but I can remedy that with some fabric flowers .............

.